








Surviving across 99 Nights in the Forest requires establishing an active campsite, gathering resources to upgrade the central fire from level 1 to level 6, crafting essential utilities, rescuing 4 lost children, and defending against hostile forest beasts. By following a structured progression plan, players can withstand relentless nocturnal threats, unlock elite gear, and reach day 100 safely.
Core Gameplay Loop and Survival Mechanics
The central objective in 99 Nights in the Forest revolves around maintaining your campsite alongside friends, exploring wilderness biomes, and locating the 4 missing children hidden in remote dungeons. As you explore the wilderness, dangerous entities emerge under cover of darkness, including hostile wolves, aggressive bears, cultist factions, and the menacing Deer.
Your campfire functions as the heart of all base operations. Burning flammable materials keeps the fire alive, creating an illuminated safe zone that wards off wild beasts and nocturnal predators. In addition to defense, resting near the flame accelerates player health regeneration, expands visibility, negates harsh environmental freeze debuffs, cooks raw food, and recharges depleted flashlights.
Upgrading the fire expands both the boundary of the safe zone and the explorable perimeter of the world map. If the fuel supply ever depletes to 0, the protective barrier collapses, extinguishing all light and leaving survivors vulnerable to deadly attacks. Begin the game by felling timber to supply your campfire, as managing your fuel supply is essential for enduring the trials of the wilderness.
Day 1 Routine and Initial Scavenging
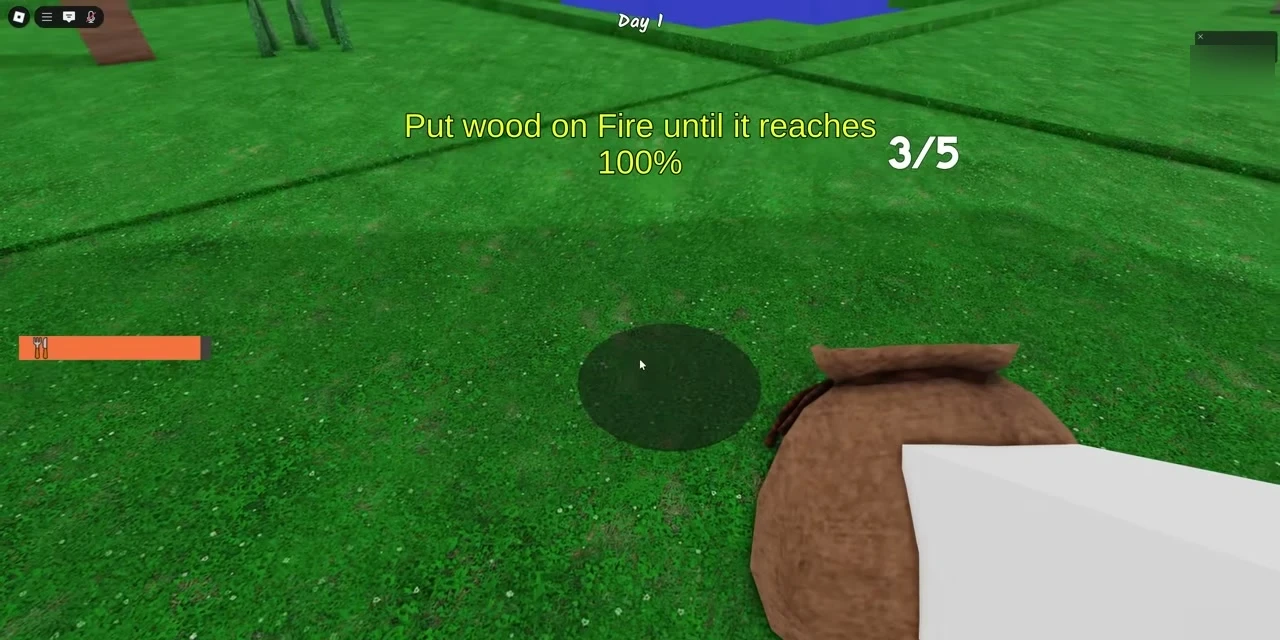
When spawning into the world, your immediate task is to fell timber and establish your baseline fuel supply:
- Equip your starting axe and chop nearby trees to collect raw logs.
- Always store gathered timber inside your sack so you can carry multiple logs simultaneously back to the campfire.
- Replant every single sapling that drops from felled trees to guarantee an ongoing supply of wood right next to your base.
- Deposit collected logs into the fire pit until reaching campfire level 3 progress, which unlocks broader map territory for scouting.
Once your campfire reaches level 3, shift your focus toward scavenging for supplies across the wilderness rather than staying idle at camp. Explore abandoned buildings, earth huts, and surface containers to locate initial equipment, such as a spear, a revolver, and raw rations.
During the very first night, the Deer remains non-aggressive and will not attack you. Take full advantage of this initial reprieve by looting throughout the darkness instead of retreating to base. If hunger begins draining your vitality, consume any raw food you come across, as taking minor consumption damage is preferable to starvation. Always inspect prominent structures, as richer chest designs yield superior loot, fuel canisters, and spare ammunition.
Pelt Trader Schedule and Early Equipment Trades
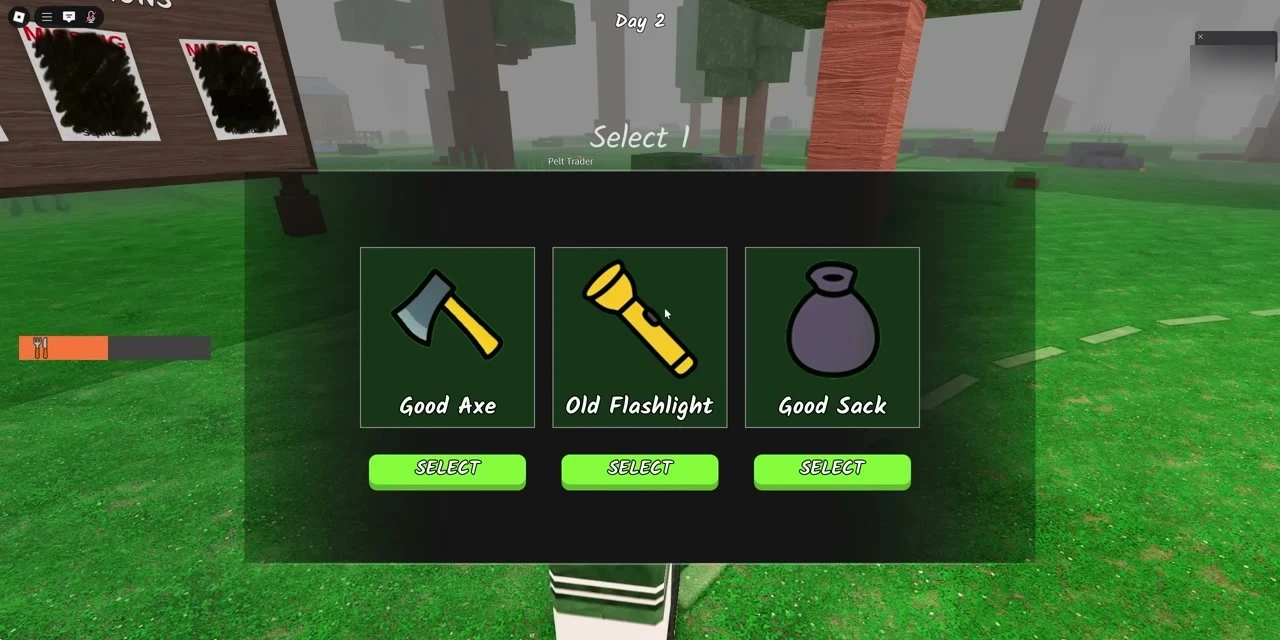
On Day 2 of your adventure, an important merchant known as the Pelt Trader arrives at your campsite, setting up shop beside the campfire near the missing children board. This vendor provides crucial equipment upgrades in exchange for animal trophies:
- First trade on Day 2: The merchant requests a Bunny Foot. Hunt wild rabbits roaming the forest floor until a foot drops. Presenting this item unlocks three reward choices: a Good Axe, a Good Sack, or an Old Flashlight. Avoid selecting the flashlight, as simple torches spawn frequently in world chests. Choosing the Good Sack expands inventory storage to 15 slots, while the Good Axe speeds up resource harvesting.
- Second trade on Day 5: The merchant returns on Day 5, following the conclusion of the first cultist raid. For this transaction, he demands a Wolf Pelt harvested from regular wolves. In return, you can claim a protective Leather Body, a melee Spear, or a Revolver. If you already possess a sidearm, he supplies firearm ammunition instead.
- Third trade: Delivering an Alpha Wolf Pelt from den leaders allows you to acquire a high-powered Rifle, a Strong Flashlight, or a Giant Sack.
- Fourth trade: Trading a heavy Bear Pelt unlocks top-tier equipment, including reinforced Iron Body armor, a Strong Axe, or a Strong Flashlight.
The trader departs at dusk and revisits camp every 3 to 4 days. Completing his transactions ensures you obtain the weaponry and pack space required for deep forest expeditions.
Rescuing the Missing Children and Advancing Day Cycles
Scattered throughout the map are 4 missing children imprisoned by the Deer and guarded by formidable predators. Rescuing these youngsters represents the primary progression milestone of the game, as each child returned to camp accelerates your day cycle count:
- Every child successfully rescued and placed at the campsite grants an extra 2 days per cycle, helping players achieve day 100 far more rapidly.
- To track a target, inspect the missing kids location board at base and click on the desired child portrait to reveal a directional navigation arrow.
Rescuing Kid 1 (Dino Kid)
The first rescue target is the Dino Kid, imprisoned in an underground bunker near the campsite:
- Follow the tracking marker toward a rocky cinder structure surrounded by hostile wolves.
- Focus your attacks on the wolves displaying red collars, as only these specific beasts drop the red key.
- Aim for headshots with your revolver to deal increased critical damage and conserve precious bullets.
- Once the pack is cleared, pick up the red key, unlock the bunker door, descend the stairs, and loot the chest within.
- Pick up the Dino Kid, place the child into your sack, and sprint back to base to secure your initial day bonus.
Rescuing Kid 2 (Kraken Kid)
Rescuing the Kraken Kid requires greater preparation and expanded territory:
- Level up your campfire to tier 4 to unlock access to the southern wilderness sector where the Kraken Kid is located.
- Slay the den leader to claim the dungeon key and harvest valuable alpha pelts.
- Unlock the chamber, rescue the child into your sack, and return to camp to boost your daily cycle advancement to four extra days.
Rescuing Kid 3 (Squid Kid)
The Squid Kid is held in deep territory guarded by deadly woodland bears:
- Advance your campfire to level 5 to expand the map boundary toward the bear habitats.
- Do not attempt this encounter with a revolver alone; acquire a long-range Rifle before setting out.
- Collect the yellow key dropped by the beasts, unlock the cell, secure the child, and loot the high-tier rewards chest inside.
Rescuing Kid 4 (Koala Kid)
The final rescue objective is the Koala Kid, representing the most dangerous dungeon confrontation:
- Upgrade your campfire to level 6, which is an absolute requirement to access the outermost boundary where the child is held.
- Prepare for battle by stocking at least 30 rifle rounds, 12 revolver shots, and equipping Iron Body armor for damage reduction.
- Approach the lair and engage the pack of 4 to 5 bears guarding the entrance. Exploit terrain choke points and keep firing headshots from safety.
- Slay the final bear, grab the dropped key, open the vault, and carry the Koala Kid safely back to your home campfire.
With all 4 children returned to the campsite, day cycles advance at maximum speed, allowing survivors to reach day 100 with ease.
Crafting Utilities and Camp Fortifications
After defeating cultist raiders, collect the dropped cultist gem to upgrade your crafting workbench to higher tiers:
- Map: Crafted for three wood pieces, the map is an indispensable navigation tool. Pressing the map interface reveals explored terrain while highlighting gray unexplored territory where valuable loot remains untouched.
- Beds: Constructing an old bed and positioning it at camp adds +1 extra day to every daily cycle. Upgrading to a regular bed and good bed compounds this effect, speeding your path toward 99 nights.
- sun dial: Placing a sun dial allows survivors to monitor the exact daylight and night time remaining, preventing accidental stranding in the dark.
- Crockpot: Food management is streamlined with a crockpot. Deposit raw meat and vegetables directly into the pot, as the station cooks items automatically into stew. Carrying finished stew on expeditions replenishes large amounts of hunger and allows extended scavenging runs.
- Biofuel Processor: Crafting a biofuel processor enables conversion of excess organic materials into high-grade fuel. Position the processor directly in front of the campfire with its rear chute facing the pit, allowing processed biofuel to dump automatically onto the burning coals.
Campfire Fueling and Environmental Weather Management
Maintaining the campfire fuel gauge at peak levels requires constant vigilance against environmental decay:
- Fuel the fire by dropping logs, coal lumps, fuel canisters, and processed biofuel directly onto the flames.
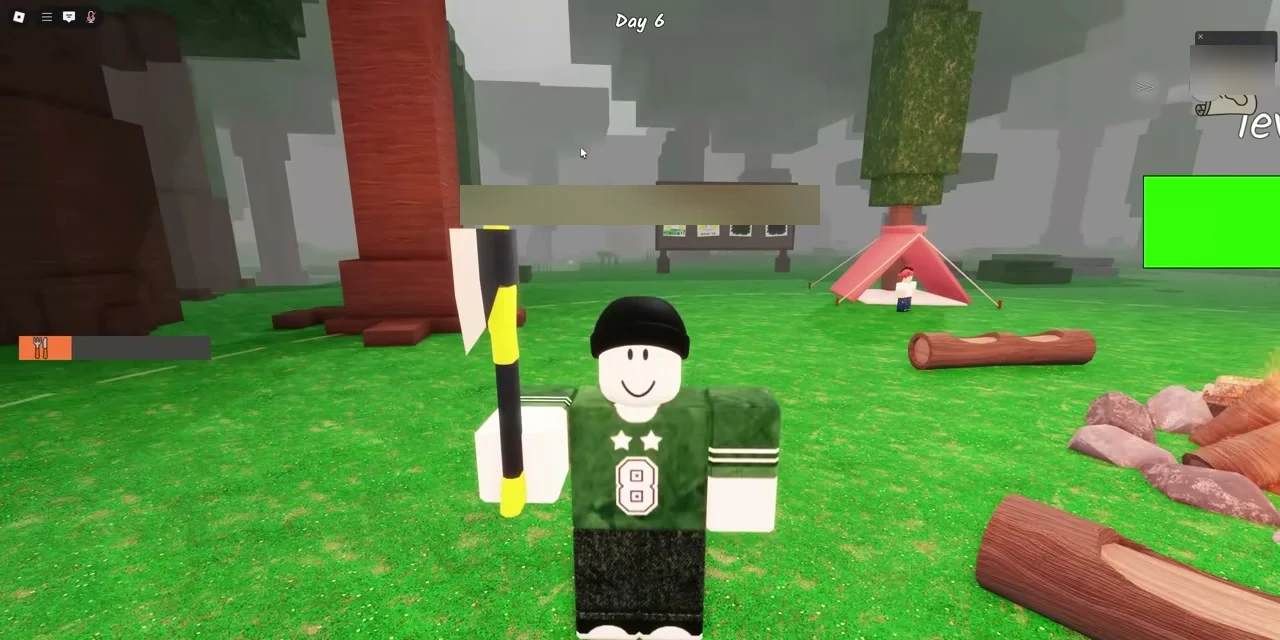
- The campfire advances across six distinct structural tiers as the fuel gauge fills to 100%:
- Tier 1: Simple timber logs placed upon the soil.
- Tier 2: Adds three wooden benches around the perimeter.
- Tier 3: Encircled by 6 protective stones, awarding the Firemaking I badge.
- Tier 4: Expands to 12 border stones, awarding the Firemaking II badge.
- Tier 5: Features a thick stone masonry base, awarding Firemaking III.
- Tier 6: Expands with a massive stone hearth and stacked logs, awarding Firemaking IV.
Higher campfire tiers burn through fuel more slowly and offer greater resistance to adverse weather conditions. Rainstorms and heavy blizzards dramatically accelerate fuel drain.
If the fuel bar hits 0, disaster strikes immediately:
- The screen alerts players that the fire has died out and safety ended.
- The protective boundary collapses, allowing hostile beasts to swarm the inner campsite.
- The Deer's spawn chance escalates to 100%, causing it to stalk camp as a ravenous Hungry Deer.
- Passive health restoration ceases entirely.
- The navigation icon and map interface vanish from view until fuel is restored.
Dropping any combustible item onto the cold ashes relights the fire instantly, driving hostile intruders away and reactivating safe zone bonuses.
Surviving The Deer and Nighttime Threats
The Deer represents the primary nocturnal threat in 99 Nights in the Forest, hunting down survivors caught outside the light:
- The monster possesses no health pool and cannot be killed; all weapons deal zero damage against its body.
- When it spawns, the beast paths in a straight line toward the nearest player outside camp.
- Its movement begins at walkspeed 35 and steadily accelerates the longer it pursues a target.
- Its melee strikes inflict 25 base damage or higher, hitting significantly harder on advanced nights.
- On certain evenings, the game issues a warning that the Deer is hungry, boosting its chase speed and causing its eyes to glow blood-red.
To survive encounters with the beast, follow strict evasion tactics:
- Directing the beam into the monster's face stuns it for several seconds, giving you time to retreat.
- The creature builds tolerance to illumination, recovering faster after each consecutive stun.
- Sprint directly back toward the campfire safe zone. Crossing into the illuminated radius instantly stuns the beast and compels it to flee into the forest.
- When cultists launch raids against the campsite, prioritize eliminating the red ranged cultist first, then mop up melee attackers to secure precious cultist gems.
Weapons, Armor, and Equipment Progression
- Melee Weapons: Standard axes can fend off early beasts, but specialized melee gear provides superior reach and damage. The Spear boasts longer range and harder hits than axes. Upgraded options include the Katana with a rapid 0.45 second swing rate, the Ice Sword which applies a slowing chill to enemies, and the Trident.
- The Revolver features a 6 shot cylinder capacity, making it excellent for clearing wolves. The Rifle features a 1 shot magazine capacity but delivers immense single-shot damage, making it the required weapon for taking down bears. The Tactical Shotgun holds a 3 round magazine, providing heavy close-range burst damage.
- Defensive Armor: Equipping protective gear significantly reduces incoming attack damage. Wear Leather Body armor in the early game, and upgrade to Iron Body armor from the Pelt Trader for superior late-game damage reduction.
- Warm Clothing: Exploring cold regions drains your freeze gauge. Equip warm garments such as Earmuffs, a Beanie, or an Arctic Fox Hat to slow down freezing penalties and explore snowy biomes safely.
Class Selection and Long-Term Build Strategies
Players can unlock specialized classes from the General Store in the Lobby using Diamonds, with prices ranging from 10 to 500 diamonds. Every 24 hours, 4 random classes receive discount sales:
- Each class begins at level 1 and can be leveled up to level 3 by completing specific in-game challenges.
- Camper (10 Diamonds): Offers a 10% reduction in hunger drain and enhanced vision at night, making it an affordable starting pick.
- Scavenger: Highly recommended for loot gathering. Grants +2 extra sack storage slots (expanding capacity to 7 in the starter sack and 17 in the good sack), faster chest opening speed, and bonus scrap drops from opened containers.
- Cook (40 Diamonds): Ideal for sustenance management, starting with infinite seasoning and maximizing hunger restoration from all food items.
- Lumberjack (70 Diamonds): Excellent for base builders, spawning with a Good Axe, yielding up to three bonus logs per tree, and providing double sapling drop chances.
- Ranger (70 Diamonds): Spawns with a Revolver and 18 ammo. Maxing out the Ranger class increases starting ammo to 30 rounds and grants a 10% chance to refund ammunition on every shot fired.
- Assassin (500 Diamonds): The premier high-tier class, granting unmatched mobility and swift melee combat prowess for elite players.
Mastering campfire management, methodically clearing kid rescue dungeons, and gearing up with top-tier firearms ensures your team can conquer the wilderness and survive all 99 nights.